Dead Light Project
|
|
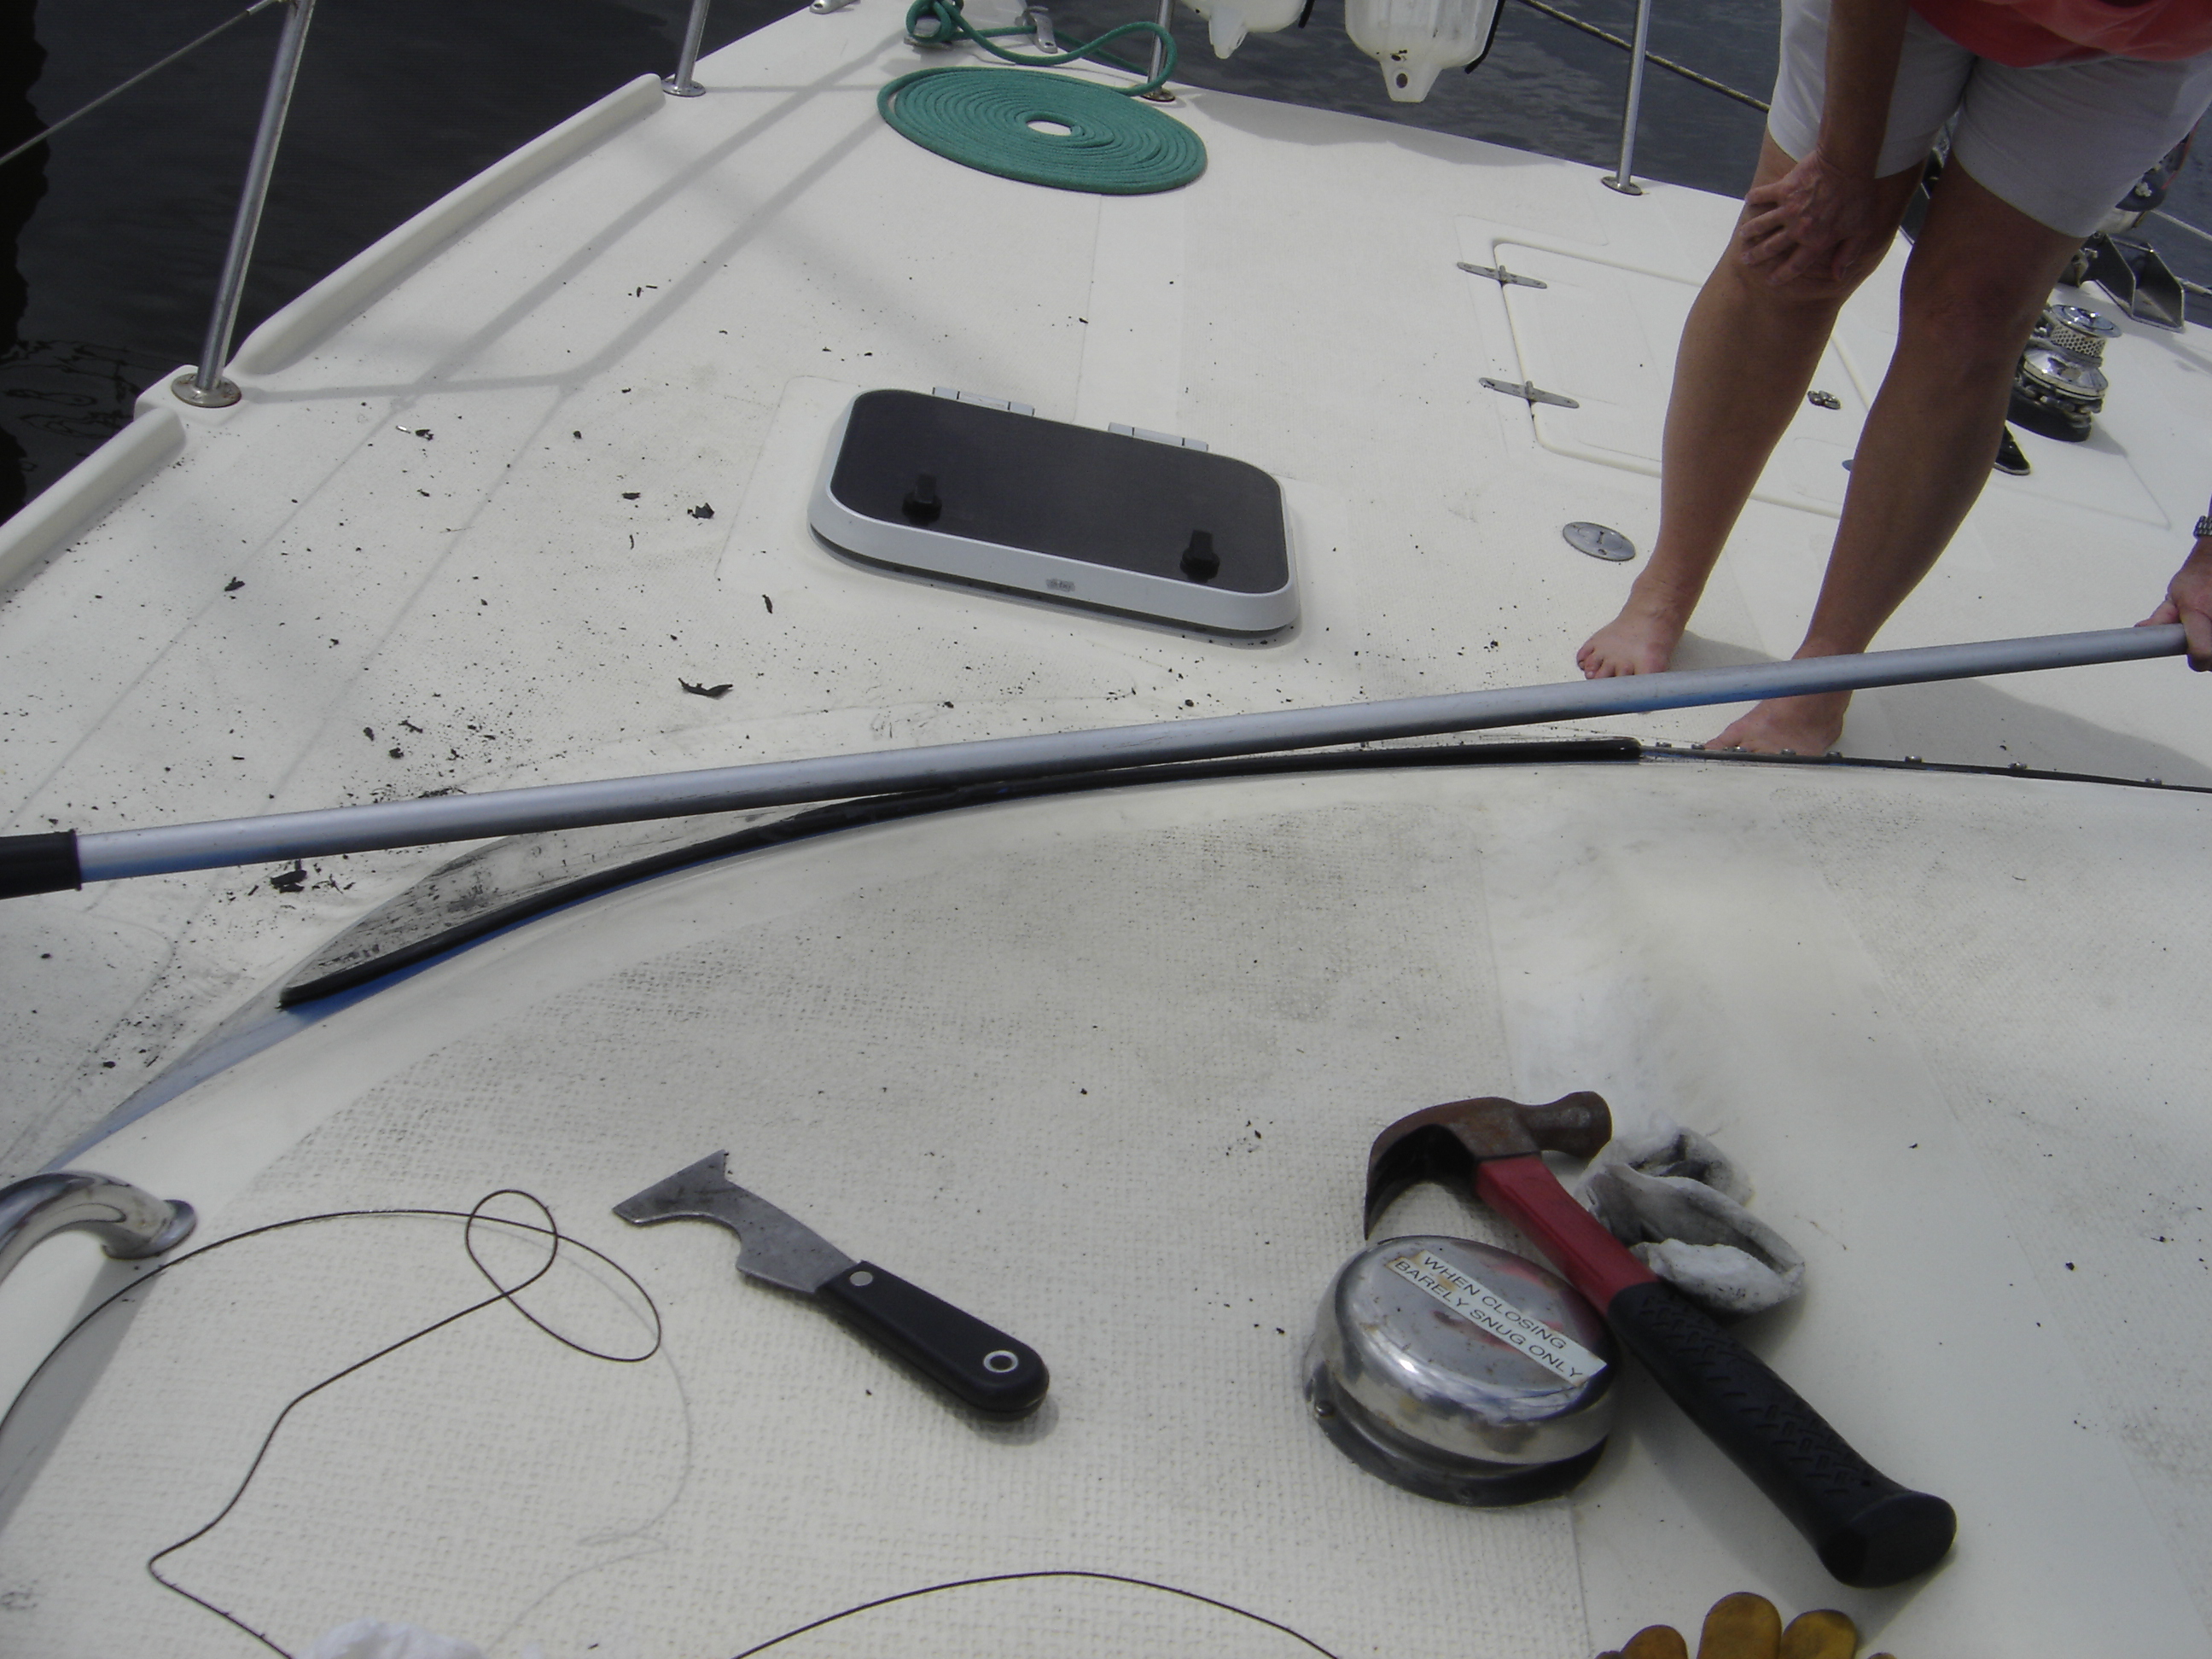
This shows how much curve there is on the two "corner" windows. Lynn holds a boat hook to compare to something straight. Photo was taken after we realized than no matter what we tried, we would be unable to save and reuse old windows. Deck is littered with pieces of the old adhesive/sealant. In the foreground are some of the instruments we tried to remove old window. Wire worked for a few inches, but is hard to use and keep straight. If cut is not true it cuts into FRP. Putty knife was a loser. Broke hack saw blade but it too worked for a few inches. Even our most delicate efforts resulted in cracking the old plexi. |
|
|
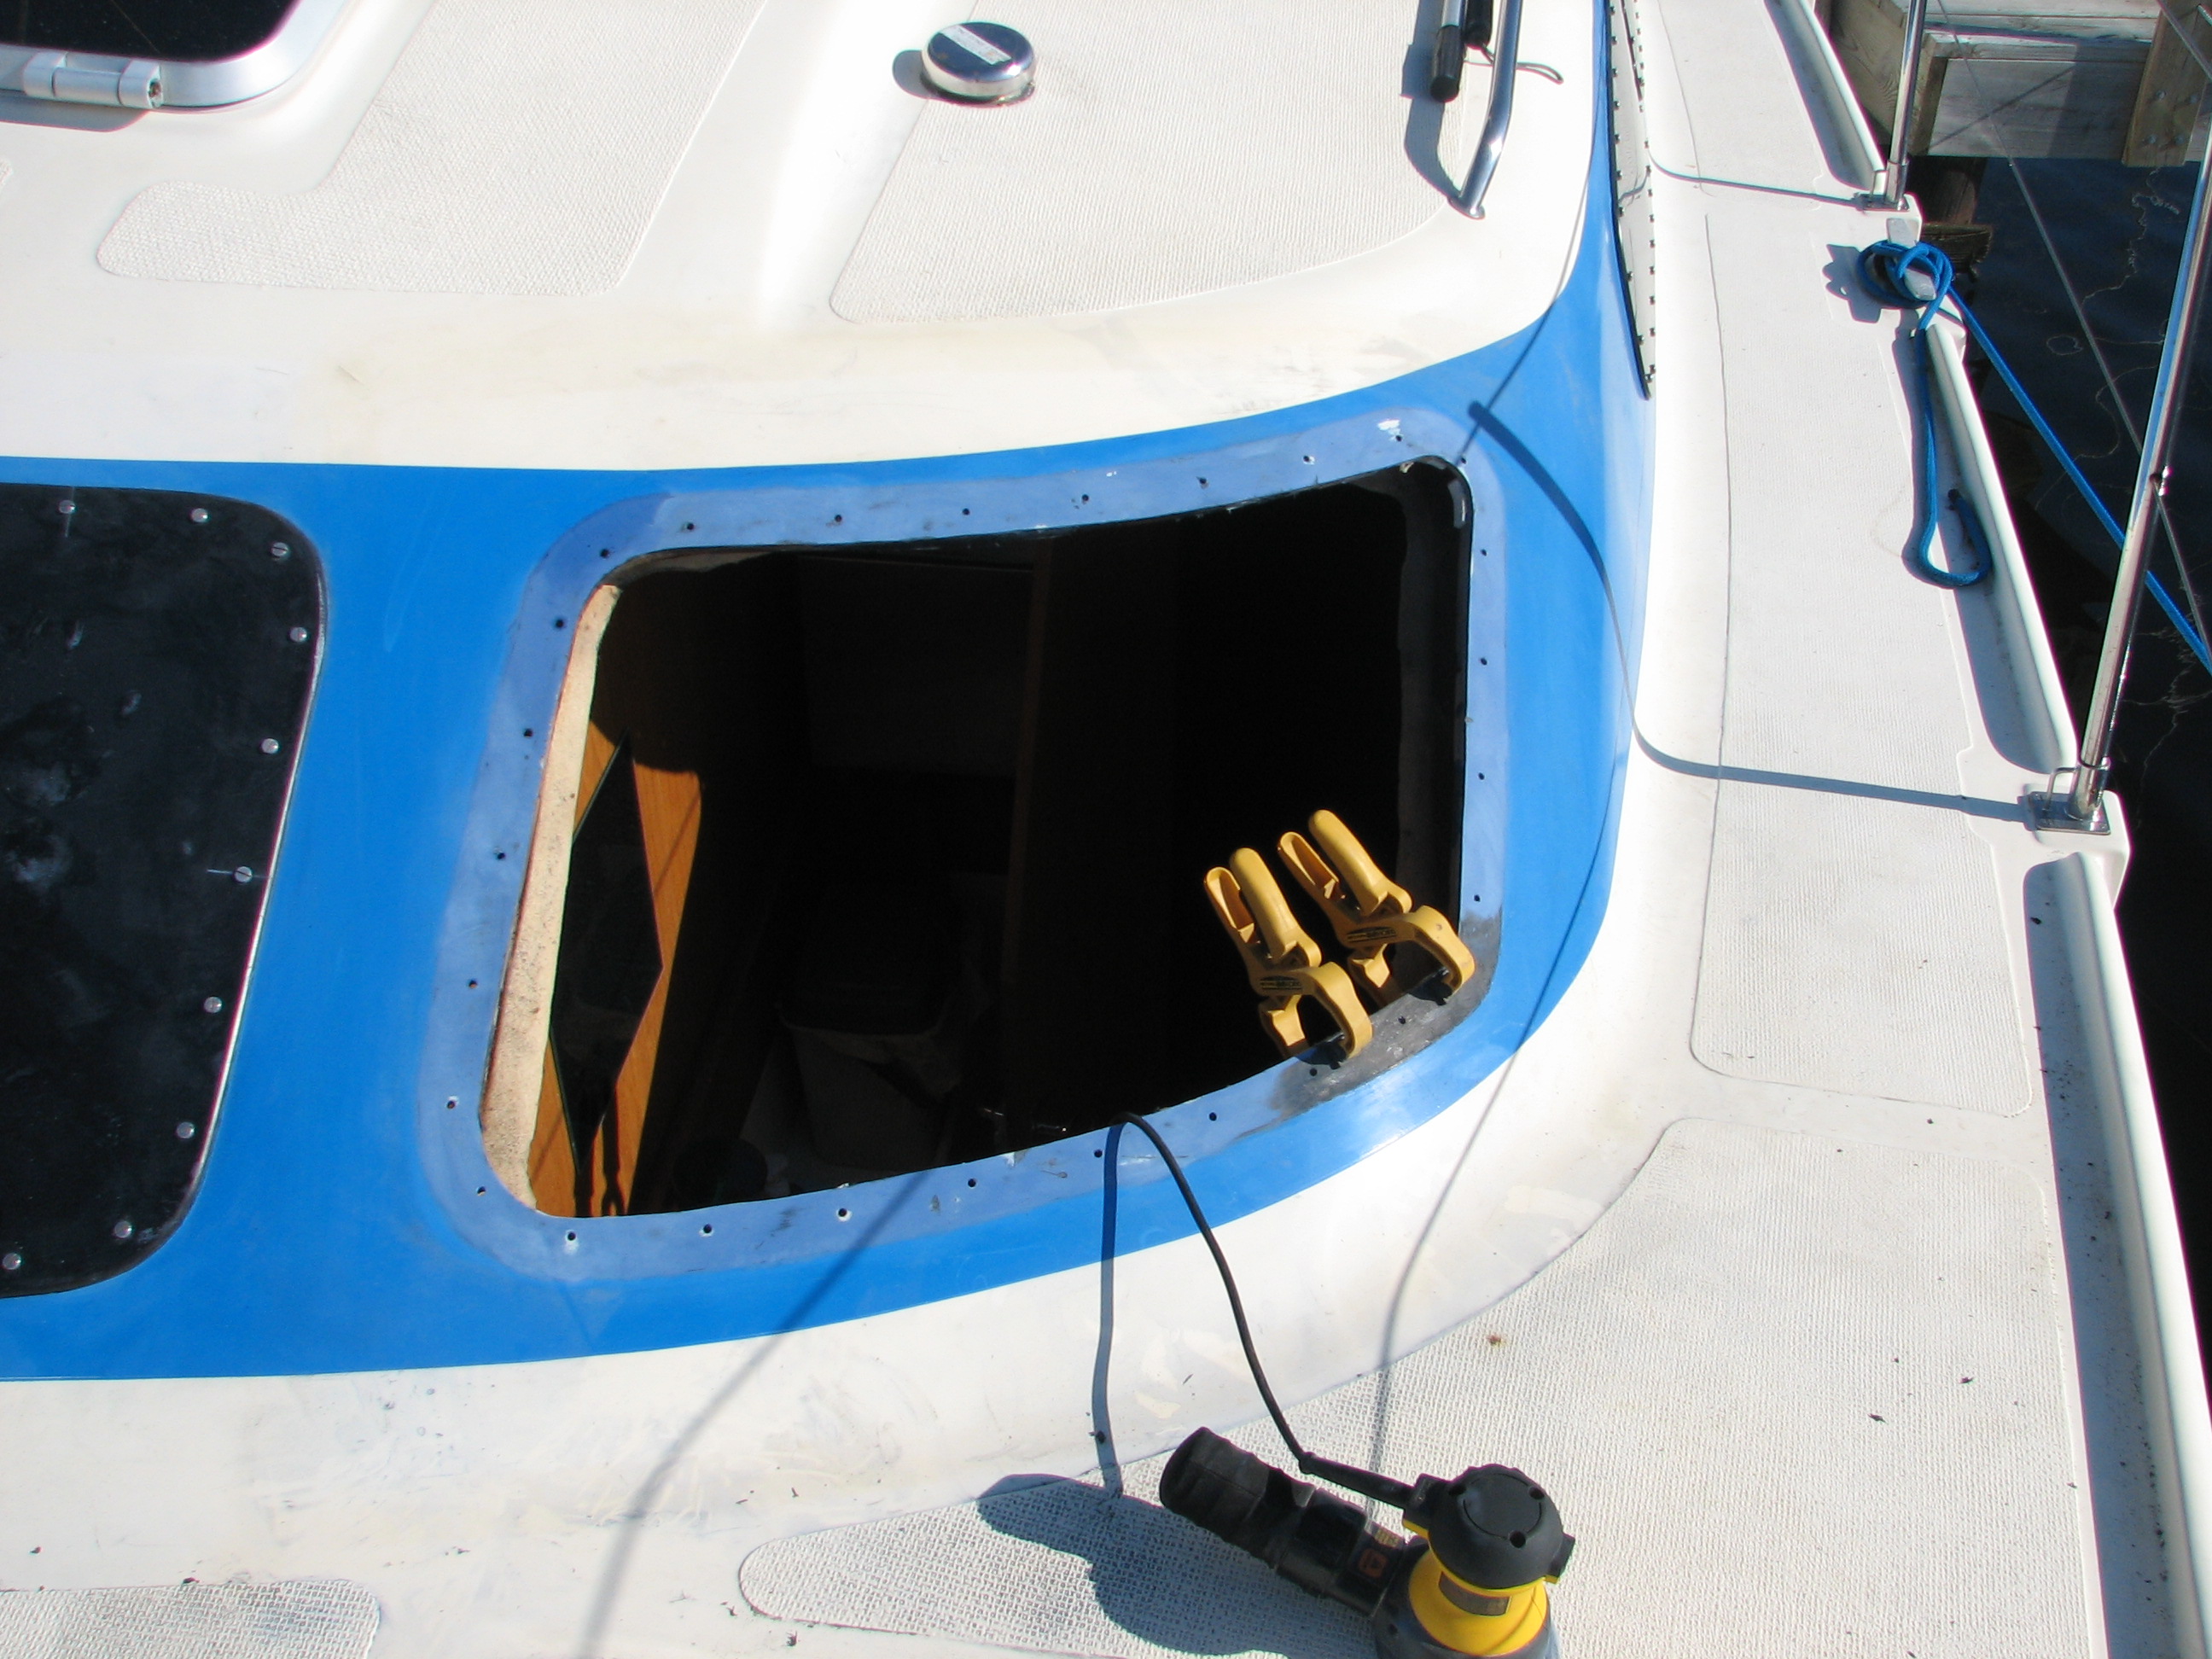
Wooden pieces around the interior of the window support the trim piece. Many of these had deteriorated and had to be replaced. Tried Starboard tm but learned the hard way that it does not glue well. Photo shows most of the area cleaned of old adhesive and clamps used to glue new wood blocks. Orbital sander with course paper did a good job of final removal of adhesive and primer. Area under clamps still shows the way it looked after scraping with wood chisel. |
|
|
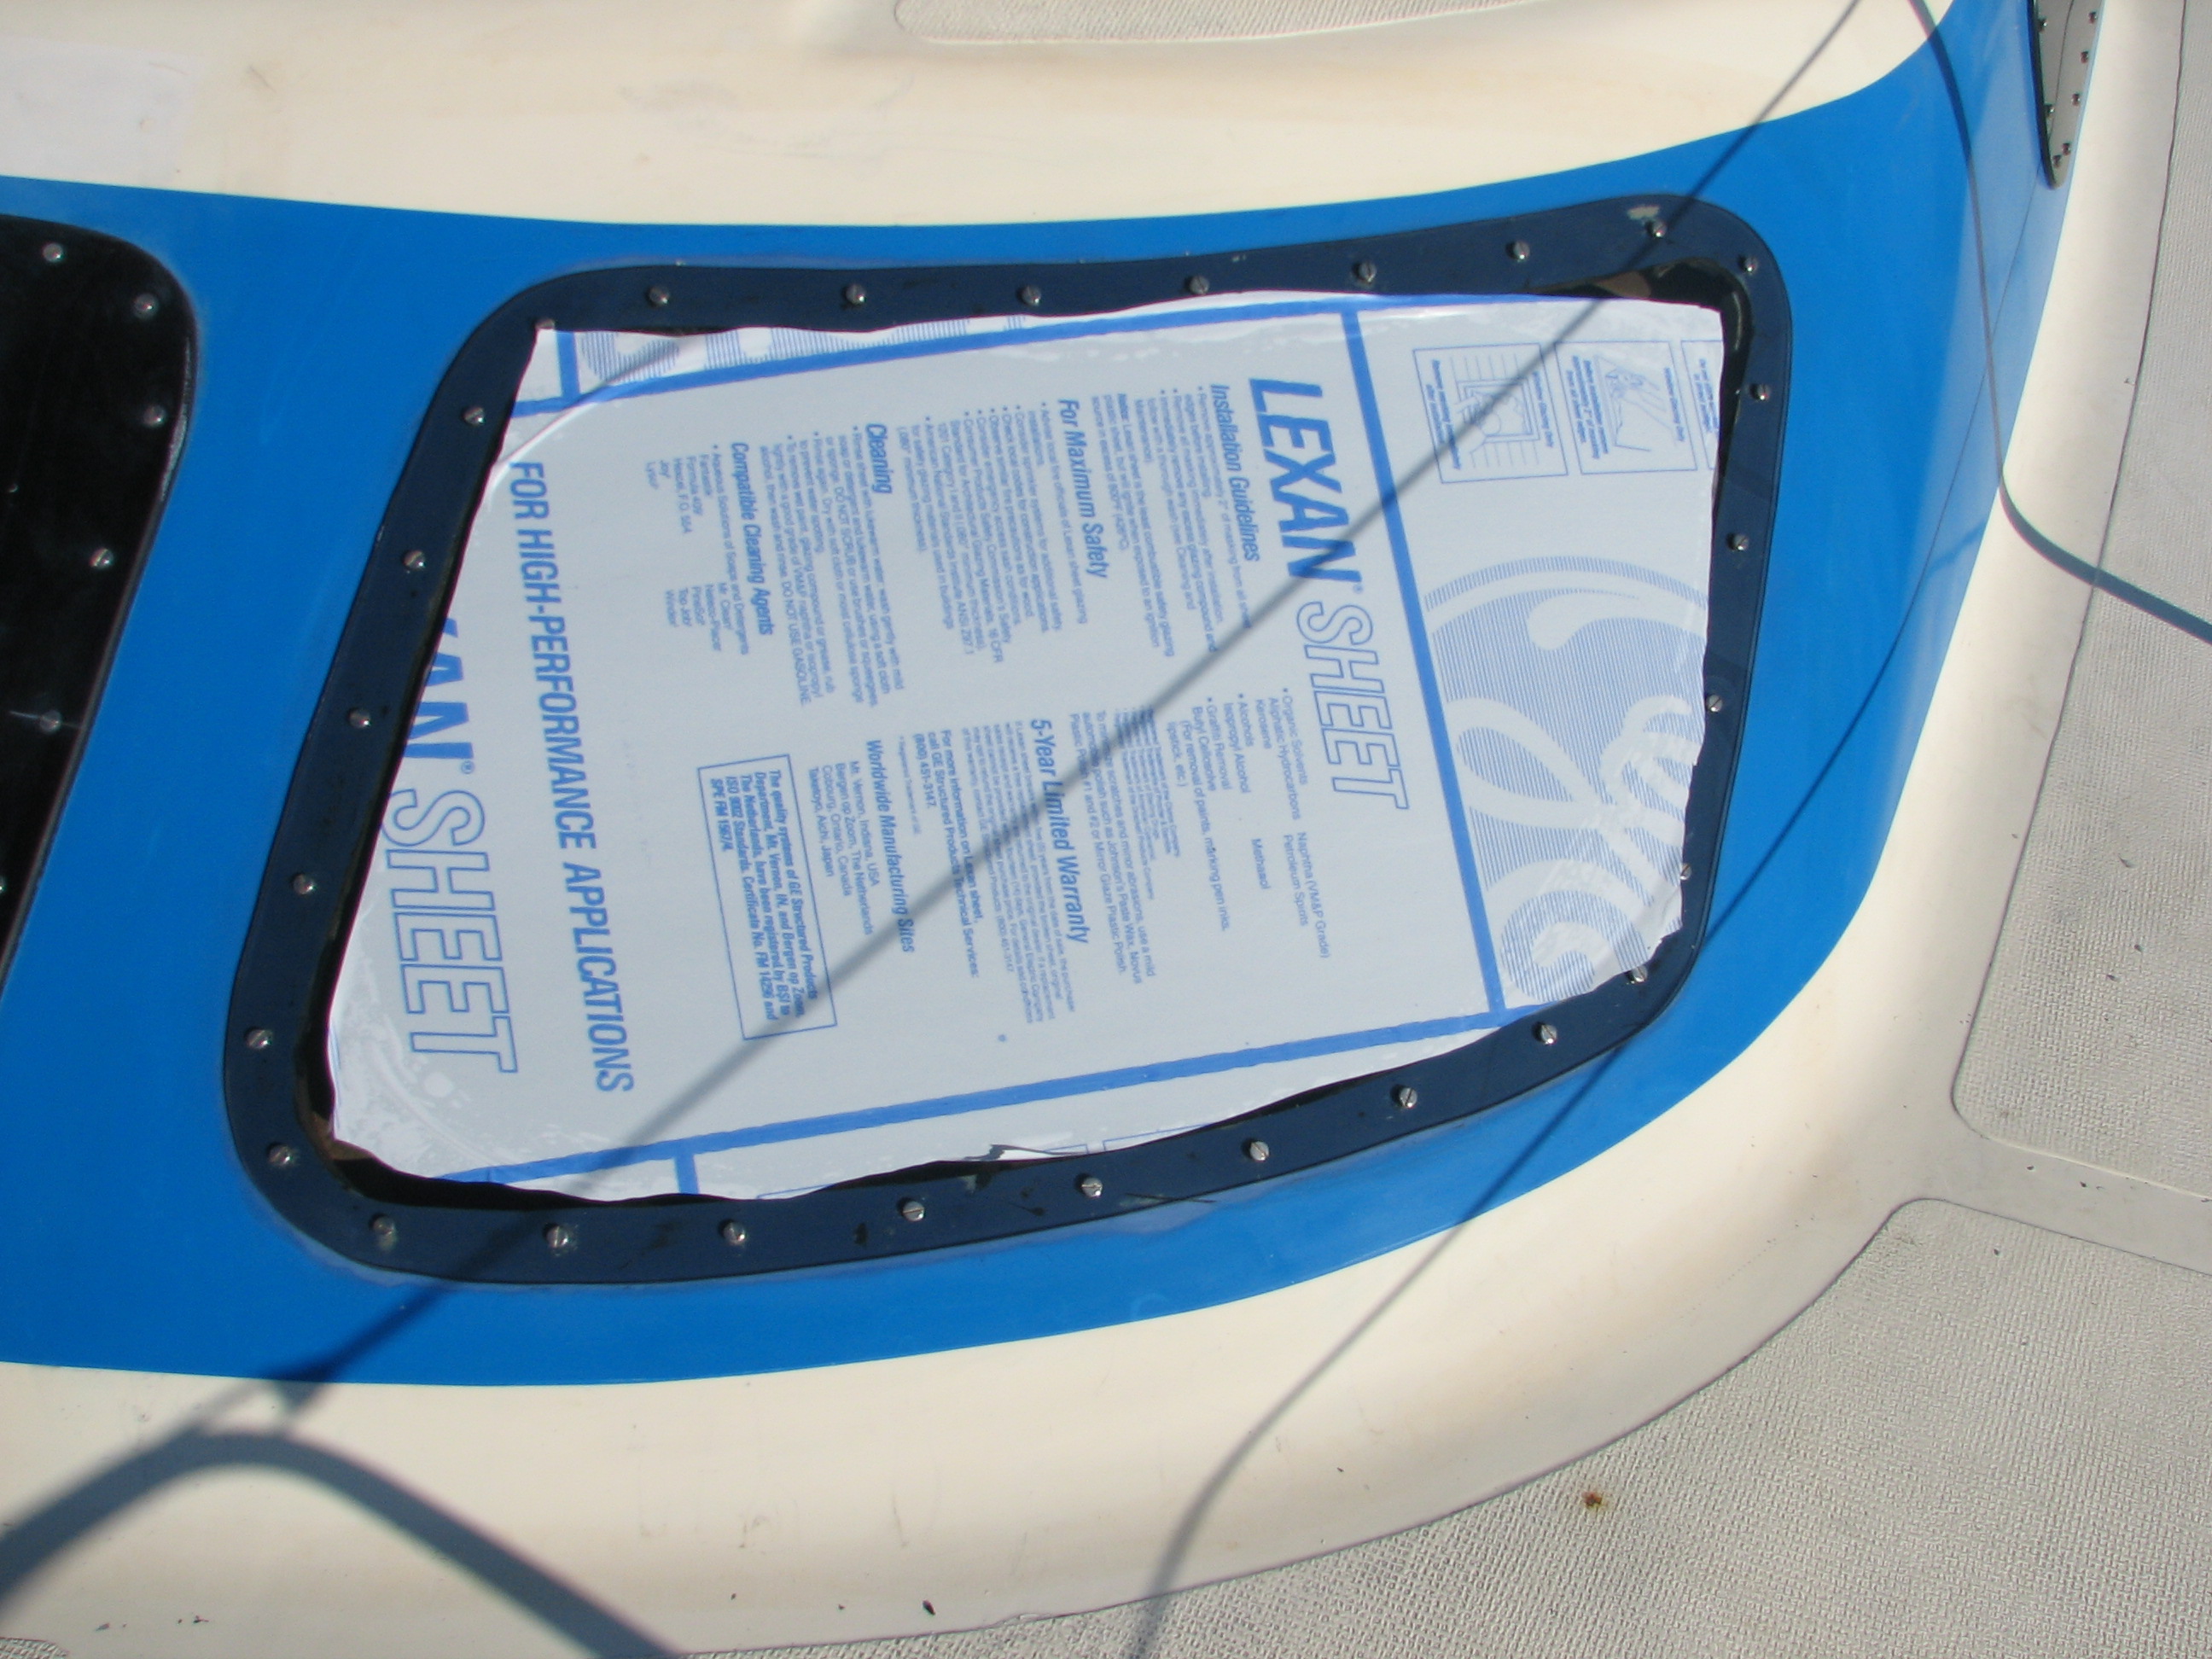
I chose to go with new fasteners. Old were .6mm metric, new 1/4-20, slightly larger. To align pane, we drilled from inside 1/4 holes and mounted the pane with no adhesive as in photo. Then we removed and drill all holes oversize (9/32) allow for thermal expansion and counter sunk both sides to reduce stress. |
|
|
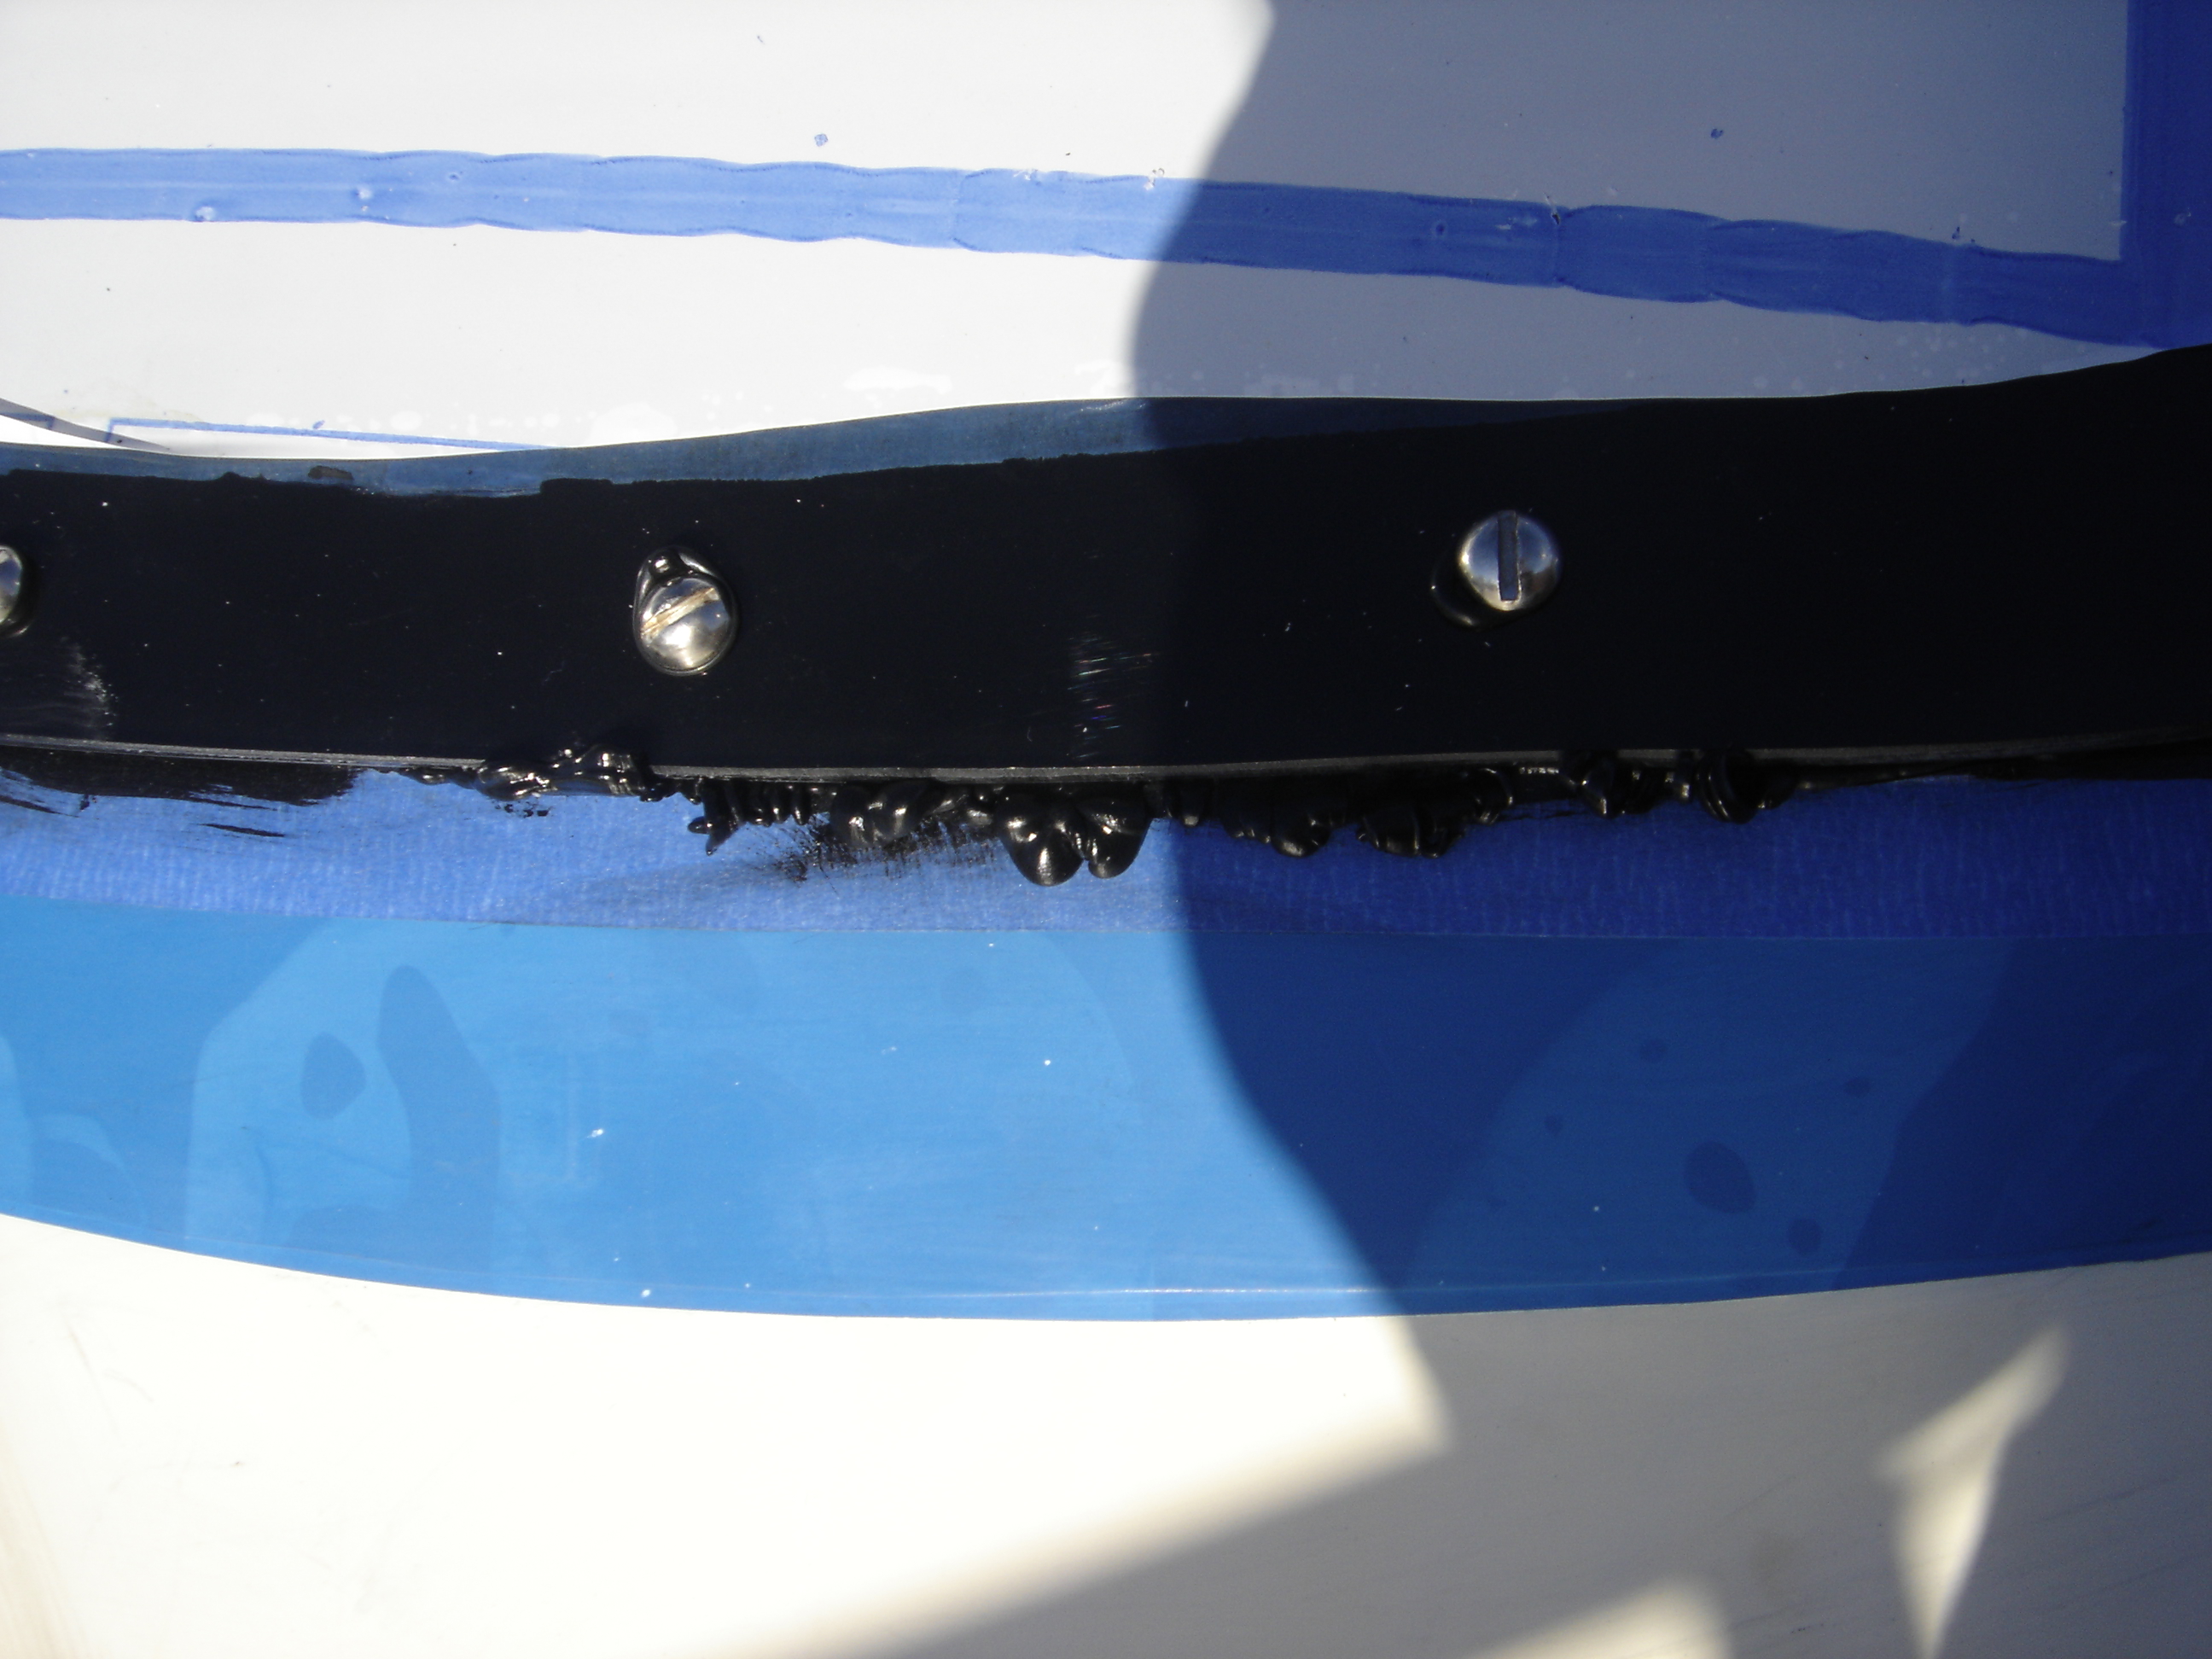
After mounting with adhesive, goo came out around edges. There are 3/16 spacers between pane and FRP to avoid squeezing it all out and to allow flex for thermal expansion. Excess was easy to trim with sharp knife. Note FRP is masked prior to priming and this help with excess as well. |
| More photos and comments to come. |